
Setting up a mesh WiFi system is surprisingly simple. You just connect one node—the primary one—to your modem. Then, you place the other satellite nodes around your house to wrap it in a single, powerful network.
The whole thing is handled through a mobile app that walks you through each step. Most people are up and running in less than 15 minutes from opening the box to enjoying full coverage. It's the perfect way to finally get rid of those dead zones and buffering headaches.
Why Mesh WiFi is the Modern Home Standard
Are you tired of your WiFi dropping out in the upstairs bedroom or on the patio? A single, traditional router often struggles to push a strong signal to every corner of a modern home, especially when it has to get through concrete walls or multiple floors. This is exactly where a mesh WiFi system changes the game, creating one seamless network that expands to fit your space perfectly.
Instead of one router trying to shout across the entire house, a mesh system uses a team of nodes that work together. Think of it as upgrading from a single, distant lighthouse to a series of perfectly placed streetlights that illuminate every single path.
The Core Benefits of a Mesh Network
- Eliminates Dead Zones: By placing multiple nodes, you create overlapping fields of coverage, ensuring you get a strong signal in every single room.
- Single Network Name (SSID): Your phone, laptop, and other devices will automatically connect to the strongest node as you move around the house. You'll never drop the connection or have to manually switch networks again.
- Easy Scalability: Moving to a bigger place or want to get WiFi out to the garage? Just add another node to your existing system. It's that simple.
- Simple App-Based Management: Nearly all modern mesh systems are set up and managed through an easy-to-use smartphone app, making it accessible for everyone to customize their network.
The need for this kind of reliable connection is only growing. The global market for wireless mesh networks is on track to hit USD 16.66 billion by 2029, largely because of the boom in smart home devices. With experts predicting we'll have over 27 billion IoT-connected gadgets by 2025, the old single-router setup just can't keep up. Mesh systems solve this by letting you add nodes to cover any home size, creating the strong foundation needed for today's connected lifestyle.
Of course, a great mesh WiFi setup needs a great internet connection to back it up. Understanding the broadband telecom services you have is key, since the mesh system’s job is to spread that service all through your home.
This modern approach gets your network ready for anything, whether it's 4K streaming, competitive online gaming, or supporting a house full of smart devices. It's also a good idea to know what technology is powering your system. Check out our guide comparing Wi-Fi 5 vs. Wi-Fi 6 to see how the latest standards can boost your experience even more.
Mastering Strategic Node Placement
Getting your mesh Wi-Fi set up just right is less about technical know-how and more about smart thinking. I’ve seen it time and again: the single biggest factor for a powerful, reliable network is where you decide to place your nodes.
Think of it like setting up speakers for surround sound—if one is tucked behind a couch, the whole experience just falls flat. Your Wi-Fi nodes are the same; they need clear pathways to talk to each other for the best performance.
The real goal isn't just to cover your home but to create overlapping zones of strong signal. Each satellite node needs to be close enough to the main node (the one wired to your modem) to get a solid connection, yet far enough away to push that signal into a spot that used to be a dead zone. Nailing this balancing act is the secret to blanketing your entire space in fast Wi-Fi.
This simple graphic breaks down the whole prep process into three straightforward stages.
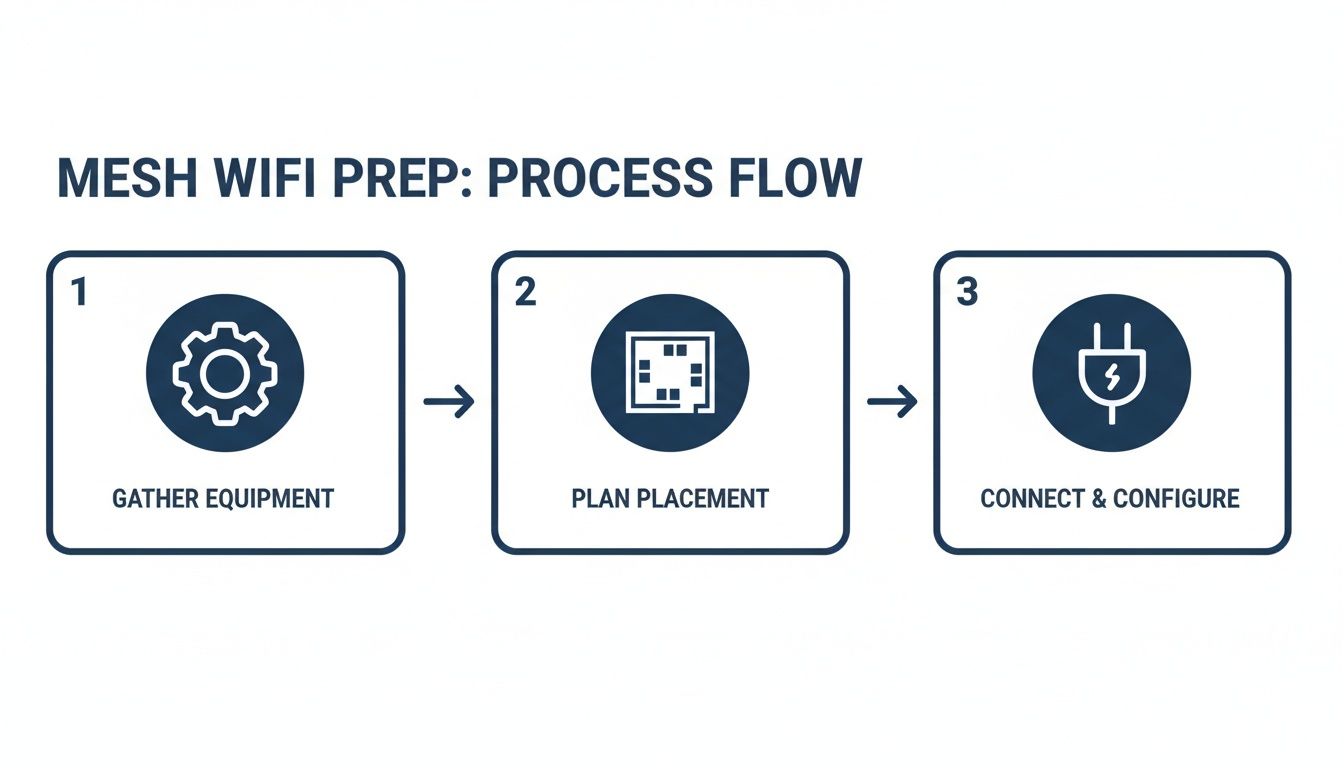
Thinking about it in these three steps—getting your gear ready, planning where everything goes, and then making the connections—makes the whole project much simpler and helps you sidestep common setup headaches.
Identifying Wi-Fi Signal Killers in Your Home
Before you even think about plugging anything in, take a walk through your house on a mission to find "signal killers." These are the everyday objects and materials that can block, absorb, or reflect Wi-Fi signals, seriously hurting your network's speed and reliability.
Keep an eye out for these common culprits:
- Dense Construction Materials: Things like brick, concrete, stone, and even old plaster walls are notorious for stopping Wi-Fi in its tracks. A signal that zips through drywall will hit a brick fireplace and grind to a halt.
- Large Metal Objects: Your kitchen appliances—refrigerators, ovens, dishwashers—are basically signal black holes. Do your best to keep nodes away from them. This goes for big metal filing cabinets and reinforced doors, too.
- Water and Glass: It might sound strange, but water is surprisingly good at soaking up Wi-Fi signals. That means large fish tanks and even dense clusters of houseplants can create dead spots. Mirrors and large windows can also bounce signals around unpredictably.
By mapping out these obstacles first, you can plan your node locations to work around them instead of trying to brute-force a signal through them.
Key Takeaway: The sweet spot for a mesh node is in a central spot, up off the floor (think bookshelf or console table), and with a reasonably clear line of sight to the next closest node. Shoving it behind the TV or on the floor in a corner is a guaranteed way to get lackluster performance.
Practical Placement Scenarios
Let's put this into practice with a couple of common home layouts. The trick is to remember how signal strength in wireless networks naturally weakens over distance and as it passes through objects.
Scenario 1: The Two-Story House with a Basement
A classic mistake is putting the main node in a corner of the first floor. Don't do it. Instead, place it somewhere central on the main level. Then, position the second node upstairs, ideally near the main staircase, to let the signal travel up easily. For the basement, put the third node at the bottom of the stairs. This creates a strong vertical connection that covers all three floors.
Scenario 2: The Long, Narrow Apartment
In a long "railroad" style apartment, a single router at one end is never going to reach the other. Start with your main node near the modem, then place the second node about halfway down the main hallway. This creates a powerful relay, carrying a strong signal all the way to the back rooms. Just make sure the hallway node isn’t boxed in by thick walls on both sides.
Understanding how these wireless signals travel is a bit of a science. In fact, many of the same challenges exist in other critical systems. You can get a sense of this by reading about how experts achieve optimized coverage and reduced interference in mesh networks for different technologies. The core idea is always the same: you're building a web of coverage, not just a straight line.
Bringing Your New Network to Life
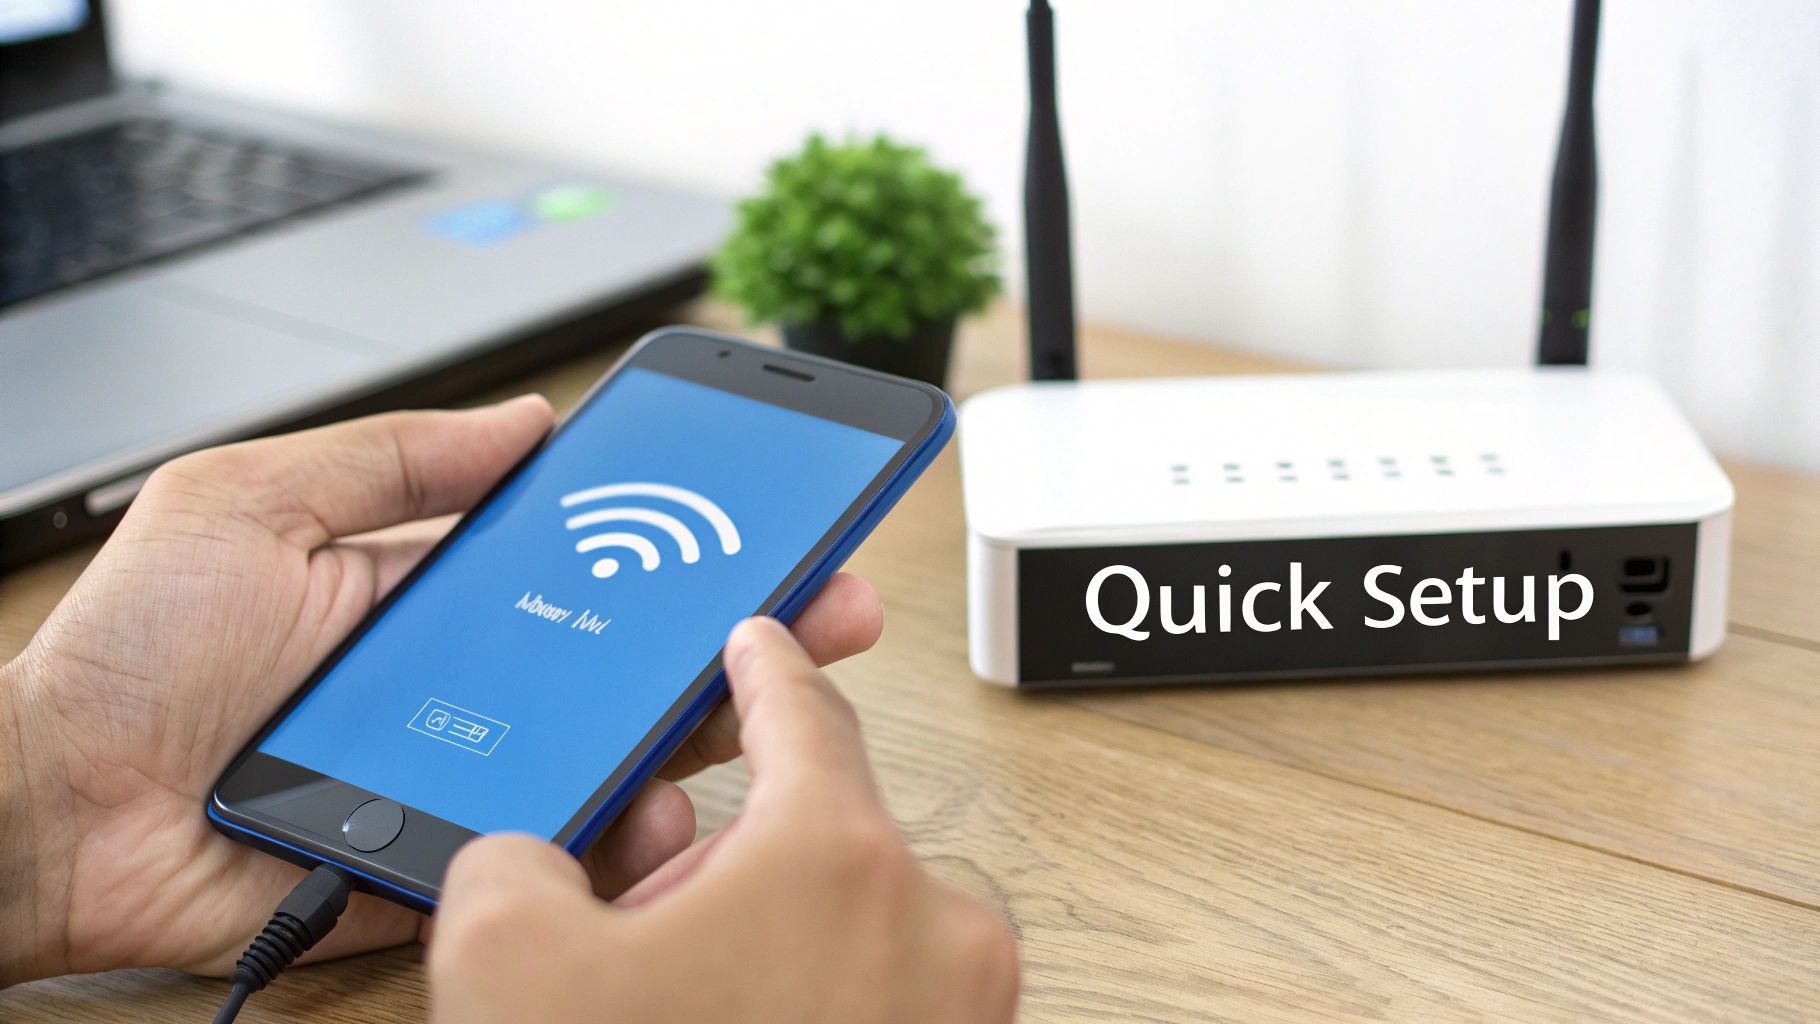
Alright, you've planned where your nodes will go. Now for the fun part: plugging everything in and watching your new network spring to life. Thankfully, the days of complicated network setup are long gone. Modern mesh systems rely on simple, intuitive smartphone apps that walk you through the whole thing.
First things first, you need to connect your primary node. Think of this as the team captain—it’s the only one that gets physically wired to your modem. Just grab the Ethernet cable that came in the box, connect one end to your modem and the other to the primary node. Then, plug it into power. You'll see an indicator light blink while it boots up, which will eventually turn solid to let you know it’s ready for action.
Navigating the App-Based Setup
With the main node powered up, it's time to download the manufacturer's app on your phone. This app is your command center for everything. It will likely use your phone's Bluetooth to automatically find the new node, making that first handshake seamless.
This user-friendly approach is a huge reason the home mesh market has exploded, growing from a value of USD 3.30 billion in 2024 and projected to reach USD 8.12 billion by 2032. Industry data reveals that about 85% of users complete the entire installation in around 10 minutes without ever needing to call for help. As you can see from these market growth insights, convenience is everything.
The app will then prompt you to create a name (this is your SSID) and a secure password for your new network. This is the only network name and password you'll need for every device in your home.
Handling Your Old Router
So, what do you do with your old Wi-Fi router? You’ve got a couple of choices, but one is definitely better for getting the best performance out of your new system.
- Best Option: Enable 'Bridge Mode': If your old router was a modem/router combo from your internet provider, look for a "bridge mode" setting in its admin panel. Enabling this shuts off its Wi-Fi and routing functions, turning it into a pure modem. This is exactly what you want—it prevents network conflicts and lets your new mesh system run the show.
- Alternative: Turn Off its Wi-Fi: Can't find bridge mode? No problem. The next best thing is to log into the old router’s settings and simply disable its Wi-Fi radios. This also stops it from broadcasting a competing signal that could interfere with your new mesh network.
Pro Tip: Never run two Wi-Fi networks in the same house if you can help it. Having your old router and your new mesh system both broadcasting signals at the same time is a recipe for signal confusion, interference, and slower speeds for everyone.
Adding Your Satellite Nodes
Once your main node is up and running, the app will guide you through adding the rest of your satellite nodes. This part is even easier.
Take your first satellite node to its pre-planned spot and plug it in. The app will automatically detect it, and your primary node will sync with it, officially welcoming it to the mesh team.
Most apps have a built-in signal strength test, which is a fantastic tool. As you place each satellite, the app will show you if the connection back to the primary node (or the nearest node) is "Great," "Good," or "Weak."
Always aim for a "Great" or "Good" connection. If you get a "Weak" reading, the satellite is just a bit too far away. Nudge it a little closer to the last node until you get a stronger signal. For the tech-savvy, a good signal reading (RSSI) to shoot for is around -65 dBm. Just repeat this process for every satellite, and you'll have a powerful, whole-home network in no time.
Fine Tuning Your Network for Peak Performance
Your mesh system is up and running, blanketing your home in sweet, sweet Wi-Fi. That’s a huge win, but we're not done yet. Now comes the fun part: diving into the settings to turn your network from just "working" into a system that works perfectly for you.

The initial setup gets you online, but fine-tuning is what stops your work laptop from dropping a video call right when your kid starts streaming cartoons. Let's unlock those powerful features hiding inside your mesh app.
Mastering Your Network Name and Password
First things first, let's talk about your network’s public face: the SSID (the name) and its password. The app made you pick something during setup, but it’s worth a second look. A good SSID is simple and easy to remember—just avoid putting personal info like your last name in it.
Your password, on the other hand, needs to be a fortress. You should aim for at least 12-16 characters that mix uppercase and lowercase letters, numbers, and symbols. This is your first and best line of defense.
Leveraging Band Steering and Guest Networks
One of the slickest features in a modern mesh system is band steering. Your Wi-Fi actually uses two main radio frequencies: 2.4GHz (slower, but goes through walls better) and 5GHz (much faster, but has a shorter range). Band steering automatically pushes your devices to the best frequency without you having to lift a finger.
This smart technology is a big reason the wireless mesh market has exploded, reaching an estimated USD 9.39 billion in 2024. The 5GHz band is seeing the most growth—at a 10.38% CAGR—because it’s perfect for low-latency gaming and streaming. With Wi-Fi 6, these systems can slash buffering by up to 80%. You can learn more about the growth of advanced mesh features on intelmarketresearch.com.
Another must-use feature is the guest network. Toggling this on creates a totally separate, walled-off network just for visitors. It's a huge security win.
- Protect Your Main Network: Guests can browse online without ever getting access to your personal computers, smart speakers, or shared drives.
- Keep Your Password Private: You can create a simple password for visitors and change it whenever you want, without the headache of reconnecting all your own devices.
- Isolate Finicky Gadgets: Sometimes, older smart home devices that only work on the 2.4GHz band can be a pain. Sticking them on the guest network can sometimes help them connect more reliably.
Real-World Tip: My guest network is always on. When people come over, I can share the Wi-Fi details with a QR code right from my phone. It's super convenient for them and completely secure for me.
Prioritizing Your Traffic with QoS
Quality of Service (QoS) might be the single most powerful setting you can tweak. It lets you tell your router what’s most important, creating a VIP lane on your internet connection for specific devices or activities.
Here’s where it becomes a game-changer:
- The Remote Worker: You’re leading a crucial video call. By setting your work laptop as a high-priority device, QoS makes sure your audio and video stay flawless, even if someone else starts streaming a 4K movie downstairs.
- The Competitive Gamer: Lag is the ultimate enemy. Prioritizing your Xbox or PlayStation 5 tells your network to send it data first, lowering your ping and giving you a much smoother gaming experience.
- The Movie Night Streamer: If flawless streaming is your goal, you can give your smart TV or Apple TV top priority. This is the key to eliminating that dreaded buffering wheel during the climax of a movie.
To make things even easier, let's break down some common settings you'll find in your mesh Wi-Fi app.
Common Mesh WiFi Features and Their Benefits
| Feature | What It Does | Best For |
|---|---|---|
| Band Steering | Automatically moves devices between 2.4GHz and 5GHz bands for optimal performance. | General use; ensures every device gets the right balance of speed and range. |
| Guest Network | Creates a separate, isolated network for visitors with its own password. | Security; keeping your primary devices and data safe from guests. |
| QoS (Quality of Service) | Prioritizes internet traffic for specific devices or applications (e.g., gaming, streaming). | Remote work, online gaming, and 4K video streaming. |
| Parental Controls | Allows you to block websites, set time limits, and pause the internet for specific devices. | Families with children; managing screen time and online safety. |
| Device List | Shows you every device currently connected to your network. | Security and troubleshooting; spotting unauthorized devices or problem connections. |
Most mesh apps make this incredibly simple, often giving you one-tap presets for "Gaming," "Streaming," or "Work." You can usually prioritize a device for a few hours or lock it in permanently. If you suspect a device isn't performing as it should, you might need to dig a little deeper with some specialized tools. You can get familiar with different options by exploring these network diagnostic utilities. Getting QoS right is the final step to achieving that perfect, customized setup.
Solving Common Mesh WiFi Setup Problems
Even when you do everything right, technology has a way of throwing you a curveball. You’ve followed the setup guide to the letter, but one of your satellite nodes is blinking angrily, or the lightning-fast speeds you were promised feel more like a slow crawl.
Don't panic. Most of these initial hiccups are surprisingly common and usually have a simple fix that won't require a long phone call to tech support.
That blinking amber or red light you're seeing? That's the most frequent issue people run into. It's just the node's way of telling you it can't get a good signal from the primary unit. The fix is often as easy as moving it a little closer.
Slow speeds right out of the box are another classic sign of a placement problem. A node that's tucked away behind a big metal refrigerator or too close to a fish tank will have its signal seriously weakened. Try moving it somewhere more open and maybe a little higher up.
Diagnosing a Non-Responsive Satellite Node
So, what happens when a satellite node flat-out refuses to connect, no matter where you move it? It's time to put on your detective hat and figure out what’s really going on.
First, try the oldest trick in the IT book: just turn it off and on again. Unplug that stubborn node, give it a full 30 seconds, and plug it back in. This simple power cycle often clears any glitches and helps it find a fresh connection.
If that doesn't do the trick, bring the satellite into the same room as your main primary node and try the setup process again. If it connects instantly, you've confirmed the hardware is working perfectly. The problem is definitely related to distance or something physically blocking the signal in its intended spot.
Key Insight: A common mistake is placing satellites too far from each other. Think of it like a chain—each link needs to be strong. Every satellite needs a solid connection to the previous node in the chain, not just a faint signal back to the main router.
Uncovering Hidden Signal Interference
Your home is full of invisible noise that can mess with your Wi-Fi. It's not just about physical walls; you also have to worry about radio frequency (RF) interference from other electronics. Many gadgets in your house use the same 2.4GHz frequency, and they can all shout over each other, creating a chaotic environment for your Wi-Fi signal.
Take a look around your mesh nodes. Here are some of the usual suspects:
- Microwave Ovens: When you're heating up leftovers, that microwave can completely drown out the 2.4GHz band, causing nearby devices to drop their connection.
- Cordless Phones and Baby Monitors: Older models of these are notorious for creating constant signal interference.
- Bluetooth Devices: While one or two aren't a big deal, a room full of active Bluetooth speakers and accessories can add to the background noise.
- Your Neighbors' Wi-Fi: In an apartment building or a crowded neighborhood, dozens of other networks are all competing for the same airwaves.
If you think interference is the culprit, try turning off some nearby devices to see if your connection improves. Often, just moving a node a few feet away from a cordless phone base is all it takes to clear things up.
The Challenge of 2.4GHz-Only Smart Devices
Here’s a tricky one you might not expect: older smart home devices. Many smart plugs, lightbulbs, and cameras were built to only work on a 2.4GHz network. This can cause headaches because your new mesh system is smart enough to combine both the 2.4GHz and 5GHz bands into one seamless network with a single name.
The problem is that your phone, which you’re using to set up the smart device, is probably connected to the faster 5GHz band. The smart device can't see the signal it needs and fails to connect.
A clever trick is to temporarily turn on your mesh system's Guest Network. Guest networks are sometimes set up in a way that makes the 2.4GHz band more visible, allowing these finicky devices to connect. If you find your devices keep dropping off, our guide on why your WiFi keeps disconnecting has more solutions.
Your Mesh WiFi Setup Questions Answered
Even after your new mesh Wi-Fi is up and running, a few questions might pop up. Let's walk through some of the most common ones so you can get the most out of your system and understand why things work the way they do.
Think of this as the final polish on your setup, tackling the practical things you'll wonder about as you start living with powerful, seamless Wi-Fi.
Can I Use a Mesh System with My Existing Router?
While you technically can, you really shouldn't. Keeping your old router running alongside your new mesh system creates a headache known as "double NAT" (Network Address Translation).
This happens when two devices on your network are both trying to direct traffic, leading to crossed signals and communication errors. Double NAT can cause major issues for online gaming, certain remote work applications, and using a VPN.
The best move is to let your new mesh system be the one and only traffic cop for your network.
- If you have a modem/router combo: The best way to handle this is to log into its settings and switch it to "bridge mode." This turns off the router part, letting it act as a pure modem that just passes the internet signal straight to your main mesh node.
- If you have a separate modem and router: It's even simpler. Just unplug your old router and put it away. Your new primary mesh node plugs directly into the modem, taking its place.
Doing this keeps your network clean and efficient, with no conflicting commands slowing you down.
How Many Mesh Nodes Do I Actually Need?
Figuring out the right number of nodes is all about balancing your home's size, layout, and what it’s made of. There isn't a single magic number, but we can get pretty close with some good guidelines.
A solid rule of thumb is to plan for one node for every 1,500 to 2,000 square feet. So, a typical 3,000-square-foot home is usually covered perfectly by a three-pack.
But don't forget about your walls. If your home has signal killers like thick plaster, brick fireplaces, or a lot of metal, you might need an extra node to punch a strong signal into those hard-to-reach spots.
My Advice: Start with what the manufacturer suggests for your square footage (usually a two or three-pack). Once they're set up, use the app to walk around and test the signal. If you find a stubborn dead zone in a back bedroom or the basement, then add one more node. It's way easier to add one later than to deal with too many from the start.
Will a Mesh Network Increase My Internet Speed?
This is a big one, and the answer is a little bit of yes and no. A mesh network cannot make your internet plan faster than what you pay for. If you have a 500 Mbps plan, your mesh system can't turn it into a 1 Gbps plan.
What it does do is let you actually use the speed you're paying for everywhere in your home. The real magic is in delivering consistent speed and coverage.
For example, with that 500 Mbps plan, your old router might have only given you 50 Mbps in your home office because of distance and walls. With a mesh node in or near that office, you could see speeds much closer to the full 500 Mbps. By wiping out those weak signal areas, your whole internet experience feels dramatically faster.
How Difficult Is It to Add Another Node Later?
Adding another node is incredibly simple. In fact, that easy scalability is one of the best things about mesh technology.
The process is pretty much the same as when you set up your first satellite nodes. Just plug the new node into a power outlet in the area that needs a boost.
Then, open the system’s app on your phone and find the "Add a device" or "Add node" option. The app will find the new hardware and automatically sync it with your existing network. The whole thing usually takes just a few minutes, making it painless to extend your coverage to a new patio, garage, or finished basement whenever you need it.
Ready to experience seamless, whole-home coverage? The Premier Broadband managed Wi-Fi solution, powered by a robust 100% fiber network, is the perfect foundation for a flawless mesh setup. Get the speed and reliability you need for everything from remote work to 4K streaming.
Explore our plans at https://premierbroadband.com and build the powerful home network you deserve.